If this is a complete disaster, it's because I'm attempting to write it before
I'm fully caffeinated.
Today we're talking about making extended beds for the Ork trukk. Here
we have Silk monitoring the painting process.
My extended beds so far.
So far none of my beds have had the walls angled out like in the base kit.
To achieve this, I shaved down the angled sides of the bed.
I used .100" x .100" strip styrene cut to about 68mm long for the sides and one
cut to 51mm long for the end. There's a little bit of variation in the
lengths as I tend to just eyeball it rather than measure, 'cause, y'know,
Orks. I built up the bed in layers of sheet styrene to get the same panel
look as the bed. It's been quite a while since I did it, but I'm fairly
certain that I used a .040" thick piece for the core and .030" thick pieces for
the panels on either side.
I then added on some thinner strips and sheet for additional panels and
straps.
Add in some rivets.
Another example. I sandwiched in a bit of granny grating on this
one. Notice that on the end there's a panel with a magnet in the
center. I was thinking that at some point down the road I might want to
have options for dropped weapons like mines or oil slicks, or maybe a rocket
booster.
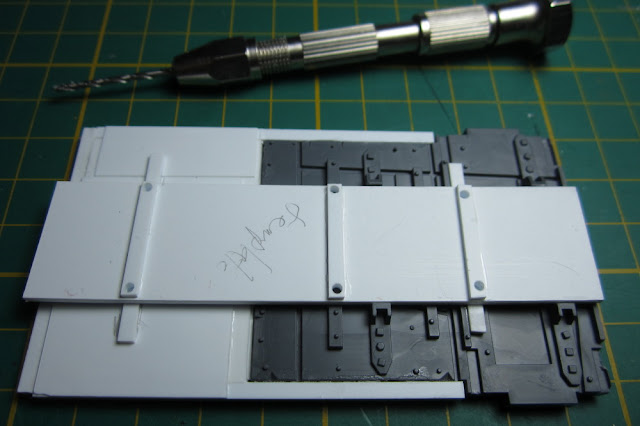
For the underside, I added a couple of strips to hold the magnets, using my
handy dandy template as a guide. Note that the two strips in the middle of
the template sit on either side of the existing strip.
And then use the template to drill the magnet holes.
Holes drilled. Make sure you get the polarity right when putting in the
magnets because it's a real pain fixing it if you don't. Learn from my
fail.
The underside of another bed before I added the strip next to the thin one on
the right.
Hopefully the magnets all line up. This is one part where you do
actually want to measure accurately and not just eyeball it.
For the side panels I used scraps, the actual kit side walls, and some bits
from the Ork battlewagon.
Random and ramshackle.
One of the things that I did was to have a nice flat spot on the outside of the
walls so I could add magnetized glyph plates.
I made some clan glyph plates. I need to make some more.
And of course, I have a template for drilling the magnet holes.
A magnetized glyph plate.
I also added magnets to the inside of the wall.
Why, you ask? So I could add moar weapon mounts.
For things like the wrecking ball.
And again, I got a little carried away with the magnets.
Fur-covered wrecking ball.
And that's probably enough for now. In the next post I'll have some pics
of the completed trukks and some of what little bit of painting I've actually
managed to do.


No comments:
Post a Comment